
Google Cloud’s HA VPN creates a tunnel between Google’s VPC private LAN and your private LAN. All traffic is encrypted between locations by default and BGP dynamically updates each site’s routing tables.
GCE VMs created without an external interface can’t access the internet by default. The GCE VMs are still accessible internally via local IPs if there’s a VPN in place. As a result, the attack surface is less because it is more difficult for attackers to reach the VMs. A Cloud NAT can be created to allow internet access without an external interface, if needed.
Cloud VPNs make it easier to share small amounts of data between locations. If there’s a need to transfer more than 100GB of data, it’s better to use a dedicated interconnect for network performance. VPNs could also connect cloud providers for an authentic “hybrid-cloud” approach or migration between clouds.
A tunnel costs $36 a month, billed hourly. The only other cost incurred is the standard network egress price starting at 12¢ a GB. If you don’t have a ton of machines to connect, it is more cost-effective to install a per-machine VPN using something like Tailscale.
End goal
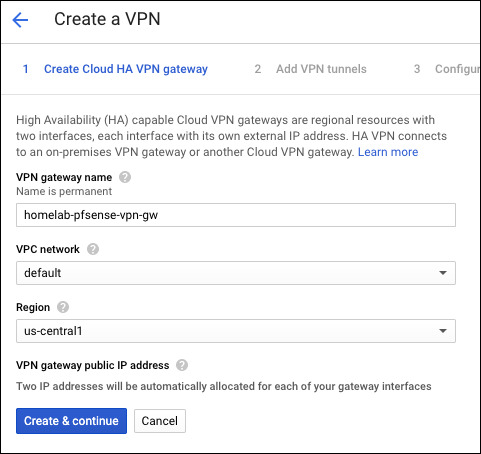
A working Cloud HA VPN connected to a local pfSense gateway. HA VPN requires dynamic routing (BGP) and adds an SLA if you run two tunnels. I plan to set up a single tunnel and ignore the SLA. For BGP, I’m using a private ASN.
GCP Setup
In Google Cloud Console, find Hybrid Connectivity under Networking and navigate to VPN.
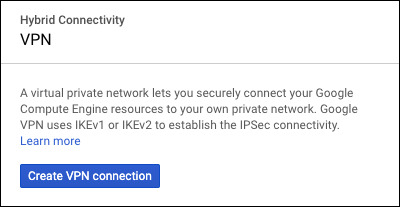
Next, choose HA VPN.
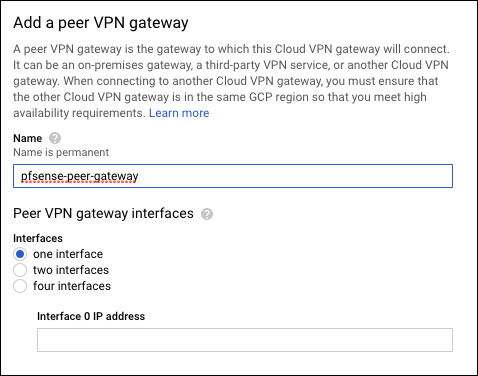
Create a peer VPN gateway that uses your WAN IP as the interface 0 address. If you’re not sure what your WAN IP is, find it at whatismyipaddress.com
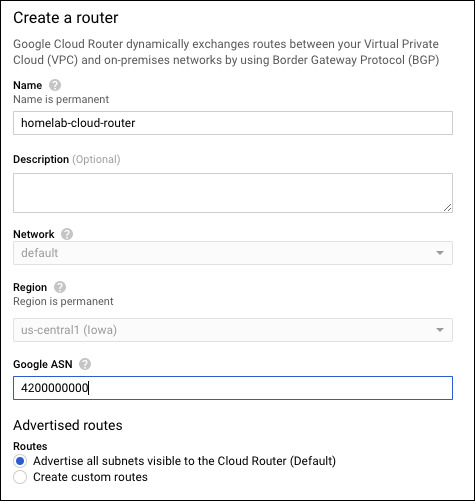
Create a Cloud Router. For the ASN, you can use any private ASN that is not already in use. I don’t currently have any BGP setup, so I’ll use 4200000000.
Give the tunnel a name like homelab-vpn-tunnel and generate a pre-shared key. This is important and needed later. For security reasons, you could generate your own key. You can add more VPN tunnels to the same VPN gateway afterward.
Save the key somewhere safe as you need it again later!
Click Configure BGP Session to set up the BGP session on the homelab-cloud-router for the tunnel. We take the defaults and input custom values.
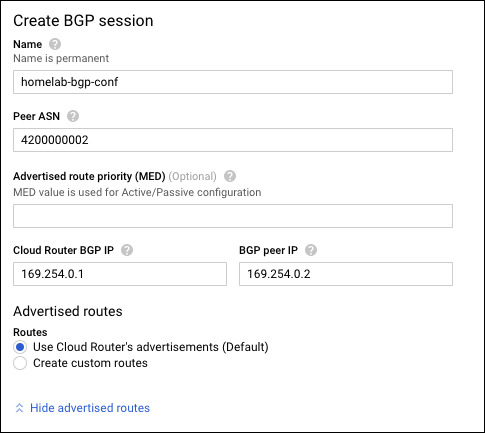
Once complete, click “Save BGP configurations.” It would be a good idea at this point to capture all the relevant data in a table, such as:
| GCP | Homelab | |
|---|---|---|
| Private ASN | 4200000000 | 4200000002 |
| Private BGP Address | 169.254.0.1/30 | 169.254.0.2/30 |
| Private Home LAN | 192.168.7.0/24 | |
| Cloud VPN IP 0 | 35.242.118.117 | |
| Peer VPN IP | whatismyipaddress.com | |
| IKE pre-shared key | HHUGyka0zvjR24GHQwBcb+am05bEgJb8 |
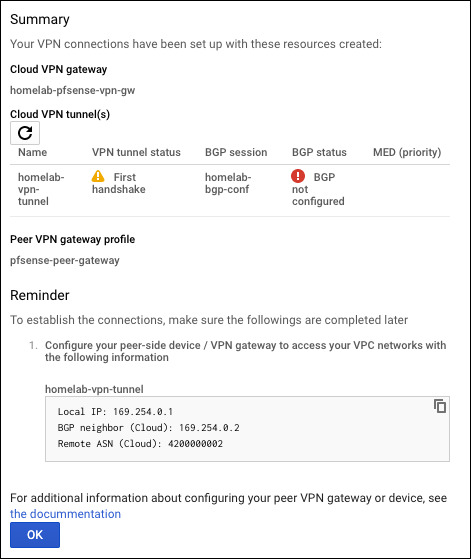
Once complete, Google shows a full summary.
Setup a VPN tunnel on pfSense
The first thing to do is allow APIPA (Automatic Private IP Addressing) traffic. By default, pfSense will drop all APIPA IPs since link-local addresses should never come from an external interface.
It is good practice to leave this disabled; in our case, Google requires using link-local IPs for BGP sessions. The console refuses to save if you update the BGP session to include a non-link-local IP address.
Navigate to System > Advanced > Firewall & NAT select Allow APIPA traffic and save.

Next, configure the VPN tunnel phase 1 by navigating to VPN > Tunnels > Add P1
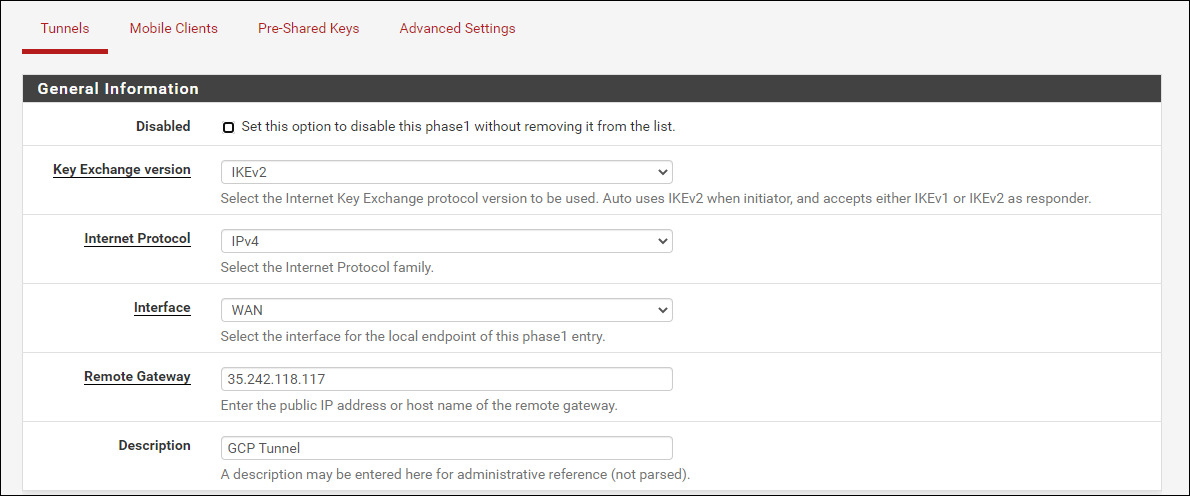
- Key Exchange version: IKEv2
- Interface: WAN
- Remote Gateway: 35.242.118.117 (From GCP)
- Pre-Shared Key: (from above)
- Save (taking the rest of the defaults)
Now setup the BGP phase 2 by navigating to VPN > Tunnels > Add P2
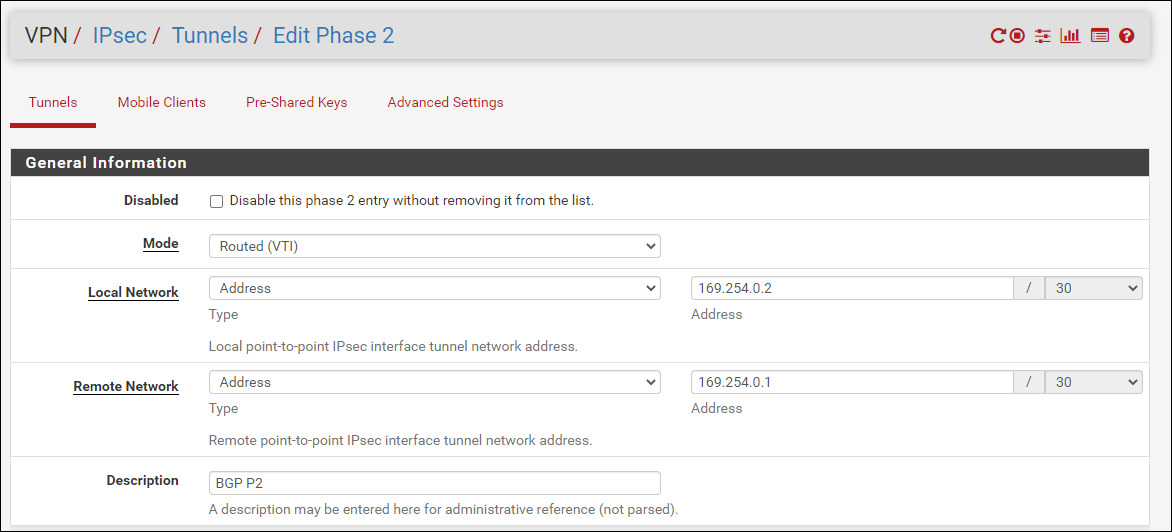
- Mode: Routed (VTI)
- Local Network: Network / BGP Private IP / 30
- Remote Network: Network / BGP Private IP / 30
- Save (taking the rest of the defaults)
We should now see the tunnel connecting and waiting on a BGP peer.

Setup BGP on pfSense
For BGP we need to install and configure a plugin named OpenBGPD.
Navigate to System > Package Manager > Available Packages and search for OpenBGPD. Once found, click Install.
Navigate to Services > OpenBGPD > Raw config and change the below text to match yours. The AS number at the top is the local private one for your homelab BGP session. The network line should include the route(s) you wish to advertise for your home network.
AS 4200000002
fib-update yes
holdtime 30
listen on 127.0.0.1
network 192.168.7.0/24
group "GCP" {
	remote-as 4200000000
	neighbor 169.254.0.1 {
		descr "GCP VPN"
		announce all
		local-address 169.254.0.2
}
}
deny from any
deny to any
allow from 169.254.0.1
allow to 169.254.0.1

More details on each configuration parameter in the OpenBGPD man page. At this point, you can confirm that the tunnel and BGP is working with GCP console.

Update pfSense and GCP firewalls
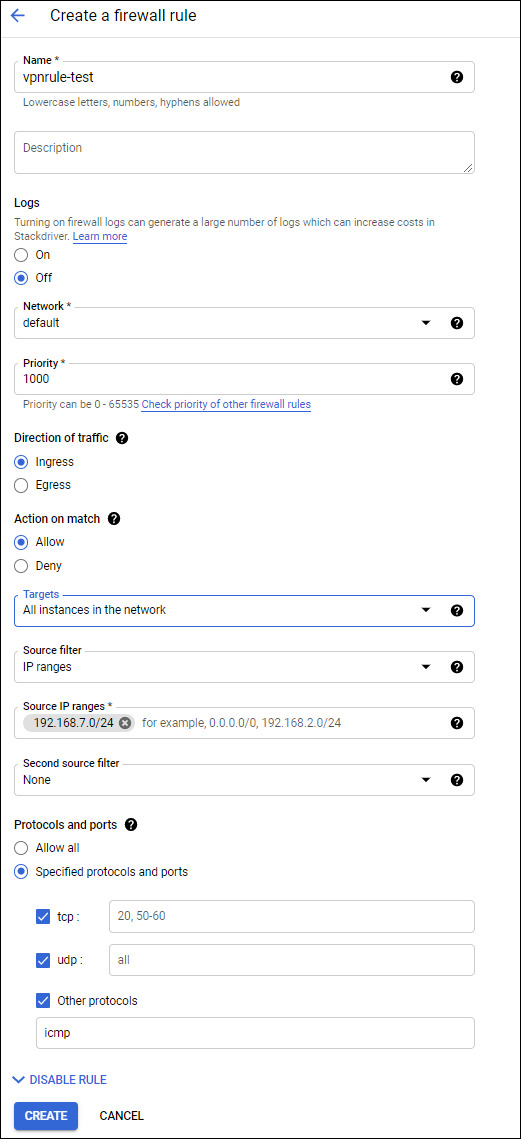
A key concept in stateful firewalls is that they usually allow outbound traffic unless a deny rule exists. What I’d like to do is allow my network to reach Googles but not the other way around. To do this, I’ll add an inbound GCP firewall rule and leave pfSense as is (default deny).
Navigate to Networking > VPC network > Firewall and add a rule allowing your internal network inbound. Replace the Source IP ranges with your local subnet(s).
For more securit, Google’s Cloud VPN supports allowlists and denylists for specific IPs to reach Google’s VPC. Find more information on restricting IPs in Google’s official documentation.
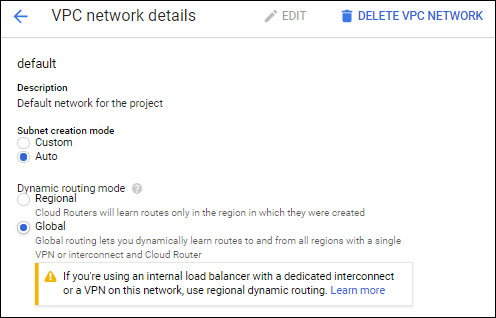
Also, depending on how you configured your VPC, the Cloud Router advertises a single region’s subnet or all subnets in the VPC. VPC’s dynamic routes, Regional or Global, control this. I want all subnets advertised, so I’ll edit the VPC to Global (more info).
We should now be able to communicate from our homelab to our VPC resources but not the other way around! 🎉
Test
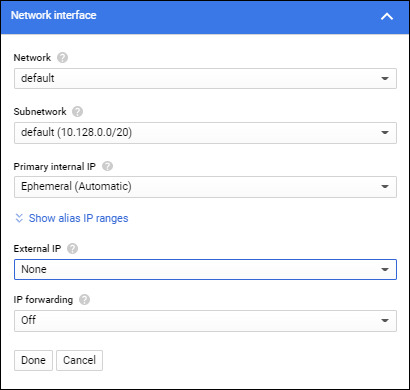
Create a GCE VM with only a private IP by clicking Management, security, disks, networking, sole tenancy and selecting the Networking tab in the Create an instance menu.
Once it’s up, I can confirm that my local machine can ping GCP private IPs and NOT the other way around.
Let’s add a rule to allow GCP to ping our resources as another test. Navigate to the IPsec firewall rules in pfSense. We’ll add a rule for ANYTHING in Google’s supernet (10.128.0.9/9) to request a ping (ICMP) for ANYTHING on our local network (LAN2). We are assuming that LAN2 also accepts ping requests.

Conclusion
An on-demand VPN connectivity allows you to extend your homelab as needed. A permanent VPN isn’t practical for my needs, but it would be interesting to automate the setup. That way, you would be able to establish and tear down VPN connectivity.
Much of my work in the cloud represents a single idea or project and rarely requires access between personal devices. For the times that I need access between local machines and the cloud, I would most likely use Tailscale.
If you only want to avoid utilizing public IPs, you can use Google’s IAP (Identity-Aware Proxy) without a VPN. See this medium article for more info.